Building a Bay Window
by Grace Shaw
What you need:
1) 3 windows – one center and two sides (directions are for N-scale
but they work for any scale, just adjust for your scale).
2) Wood sheathing 4 inches square – I like to use 1/32 scribed wood
.025 SRC 1/32; 1/32 SRC 1/32; or .040 SRC 1/32; (SRC is scribed wood)
3) Wood strip 2” -3” long x 1/32” thickness. You can use quarter
round, square, or double bead. Even a toothpick if it is thin enough.
4) Plastic roofing – if desired. 8030 Grandt-line roof sheets. I use
the sheathing and then use fine sandpaper for shingles.
5) Glue – I use the gel instant glue. The glue must hold plastic to
wood. If you have a favorite, by all means use it.
Most supplies available on this website.
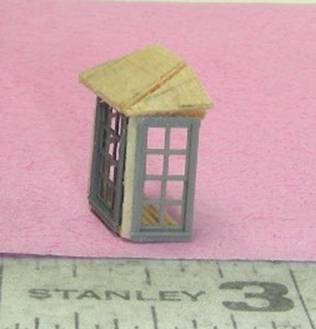
A bay window by definition is a three-sided window. The center window
can be a picture window with two side windows with mullion bars, or the
center window can have mullion bars. Normally, if you have mullion bars on
the center window, you try to have the same configuration on the side
windows.
Working in N-scale (1:160) which is suitable for 1:144 scale is a little
tricky because the windows are so tiny. The first step is to pick out the
combination of three windows you want to use. There is no standard size for
a bay window. It can be as large or small as you want it. This same building
principle works in other scales.
Cut the wood strips to the height of your windows, and then glue a strip between the edge of the center window and the edge of the side window. Make sure that the side window is at an angle that will allow it to fit onto the side of your house. Repeat with the other side window. \__/ Your windows should be this shape. Let them dry thoroughly.
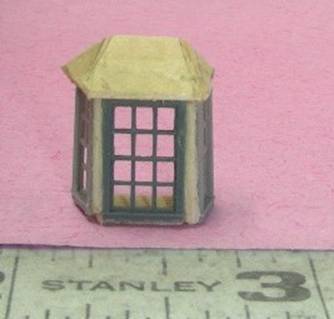
A bay window has a base and a top that are the same shape. The shape is determined by the windows you use. The beginning of the shape is the width of your center window plus the width of the wood strips. The depth of the base/top is the depth of the side windows.
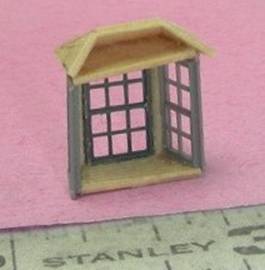
I like to use the scribed wood for making these parts because, when stained, it makes the base/top look like they’re made from wood strips. It gives a nice finished appearance. Cut out and fit the top/base in the \___/ shape. Dry fit them to your windows. Make sure that your windows are nice and even. Specially from the front view. The base is more important than the top because the top won’t show. It’s just there to stabilize the window.
Once you’ve made sure that the shape of the base/top are correct, glue them between the windows. Do the base first. Let it dry, and then glue in the top. It’s very important that you let everything dry as you go or the whole operation becomes impossible to do because the pieces are so tiny.
The roof is the hardest part. Again, you will need to fit the roof to the windows that you have choosen. The easiest way to do the roof is to lay out the shape, for the front and both sides. Cut out the shape but keep everything in one piece. Score the bend lines and bend the wood to fit over the top of the window. Than angle of the side pieces should be the same angle you used for the base. The shape of the roof is
__________
\ / \ /
\ /_____\ /
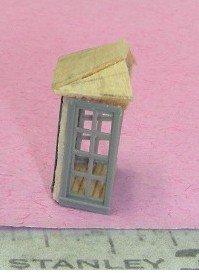
Make the roof deeper than you think you will need it to allow for the pitch.
Once you cut it flush with the base, the window should fit flat on the side
of your house. Tip: Make the opening for the window a hair smaller than the
width/height of your window so that you have the wall to glue the window
onto. Glue the window to the side of your house over the opening you’ve cut
for it.
If you’ve used the roofing sheet, you are now finished. If you used sheathing, you need to make tiny shingles for your roof. Cut very fine sand paper into 1/16” strips, and then cut the strip 2/3 of the way through for individual shingles. Don’t forget to stagger the strips so that your roof shingles do not line up in straight lines.