Grace's Projects
Dedicated to the Glory of God

Small Projects & Other Things-6  2017 - 2022

Revised 9/30/2023
Click on images for closer views
These pages are not abandoned. They are historical page.


144 scale NE Lumber Queen Anne
After many years of having the NE Lumber 144 scale kits sitting n my old work room, a customer asked how long it would take to build one. I didn't know so I got out one of my own and put it together to see how long it would take so I could give her a ballpark on the cost. I made a bunch of mistakes on this house but make them work so mine is a bit different from what anyone else's would look like. Still, I hope you enjoy your tour. 9/2023 (Click on photos for a close up.)


Front and side views are pretty obvious.


How do you like those flowers around the house?


Use the method Jean Day taught me.. Using  bunka to make the tiny flowers.

Back view with the lights out.

Back view with lights on.

Bedroom

Office
Behind the office is a bathroom that I couldn't photograph. You can only see it a little through the open doorway. I put an extra wall in there and the bathroom is behind the wall.

Living room. The curtains got a little over kill but in real life they don't stand out quite so much.

Dining room. The curtains are see through but you can't see through them in the photos.
I love the way the outside turned out. The inside not so much. It's acceptable but not as much as i would have liked it. Oh well, can't win them all can we? Hope you enjoyed looking.  

Quarter 
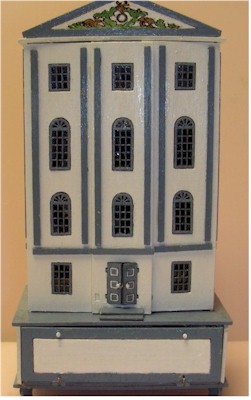
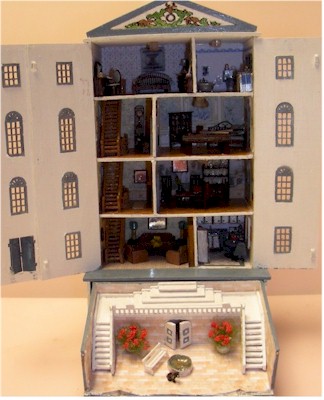
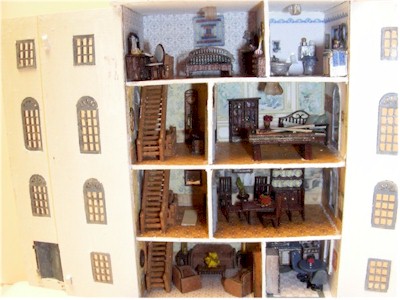
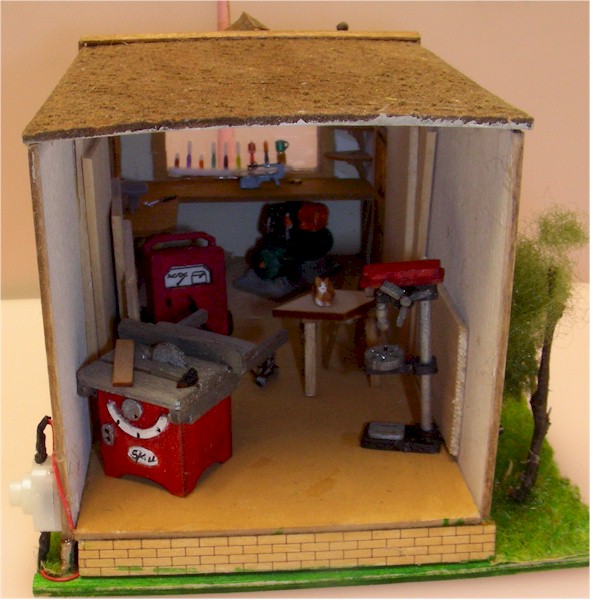
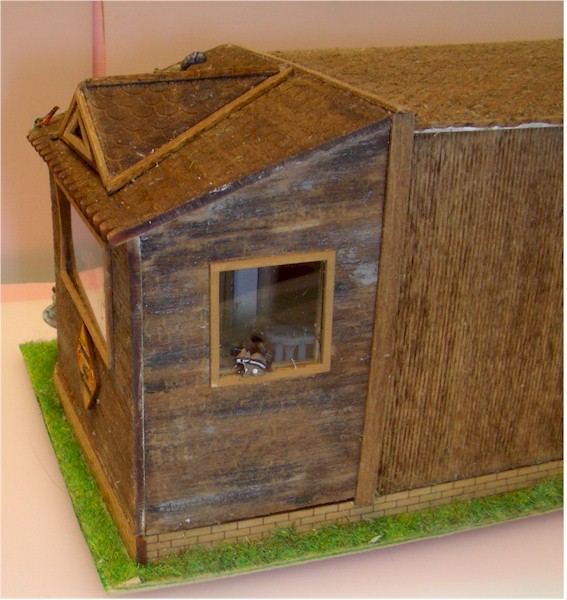
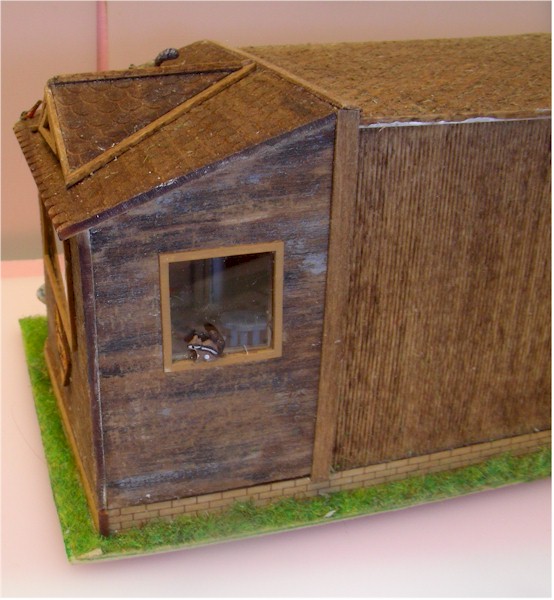
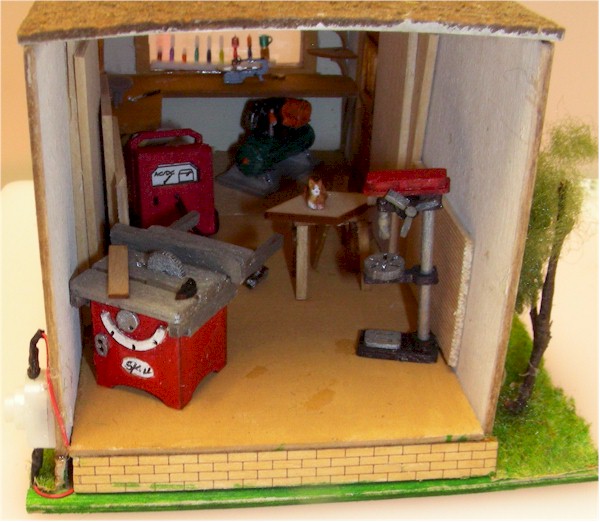
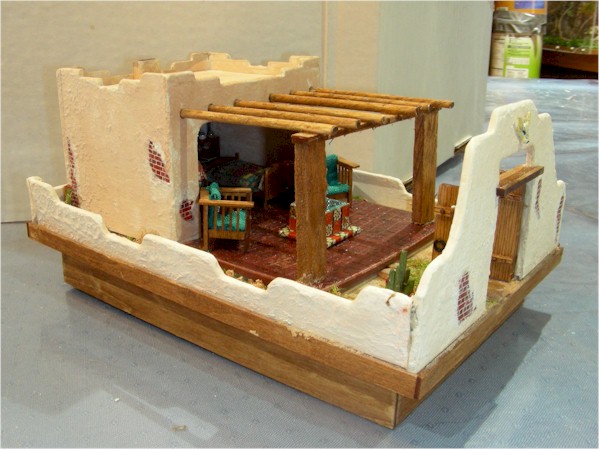
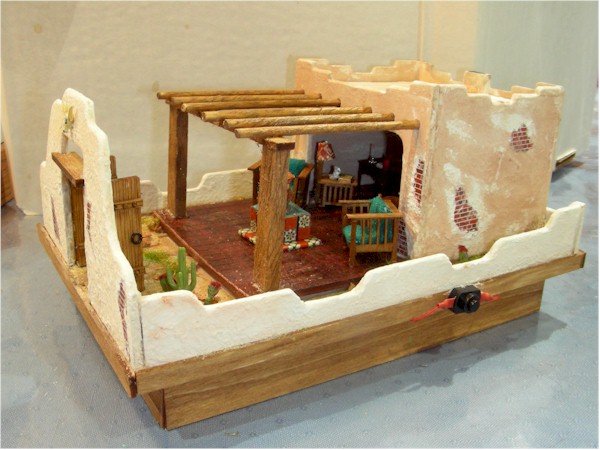
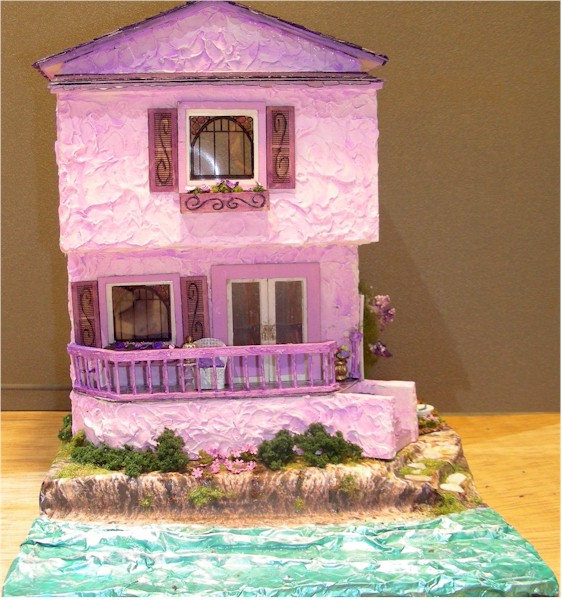
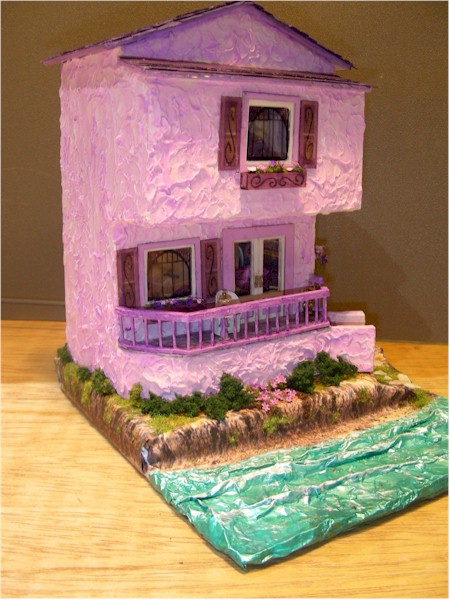
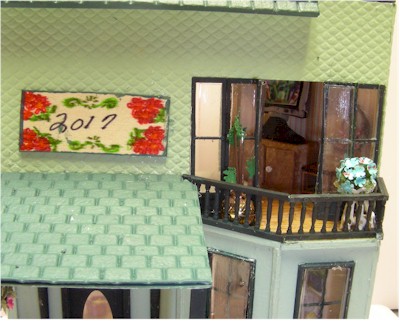
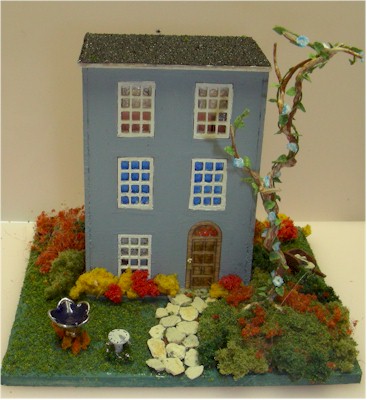
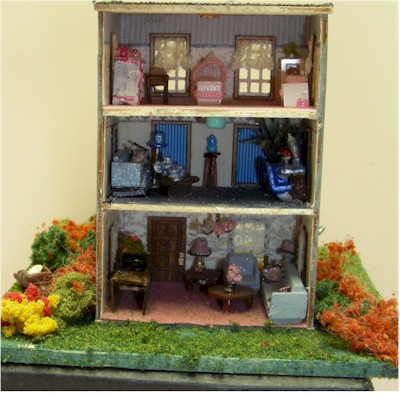
Scale Green Gables Guest House 2017
This house was a long time finishing.  A friend gave me the unfinished house several years ago and I started working on it but wasn't happy
with the way it was going, so I set it aside. And there is sat for quite awhile. This week, I decided to finish up some of the older,
unfinished projects. It actually didn't take me all that long to completed the building, though I didn't finish the electric in it. Maybe I'll do that
at another time. Meanwhile the wires are in there. I furnished it with things I've been saving from the QS World Yearly Swap group
I've been saving things from for several years. Hope you will enjoy it.
Guest House
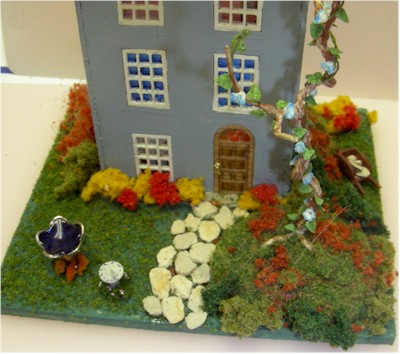
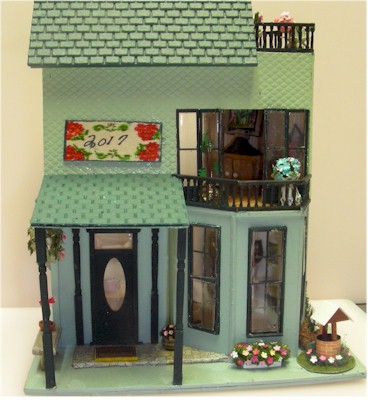
I've called this little house a Guest House.
big screen TV
Through the front window, you can see a big screen TV sitting on a cabinet.
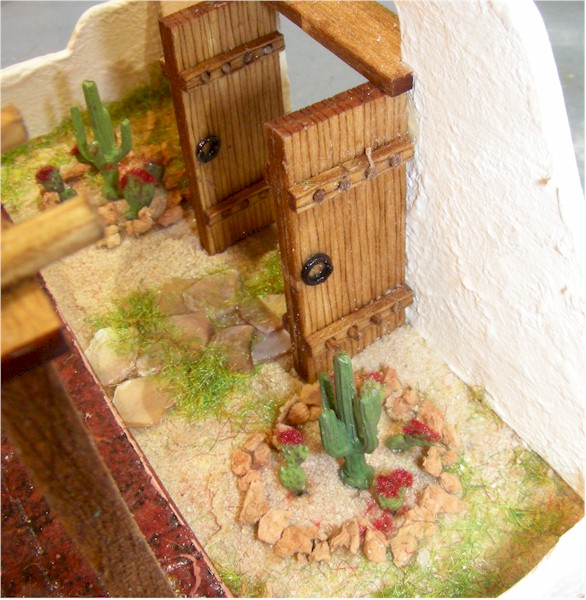
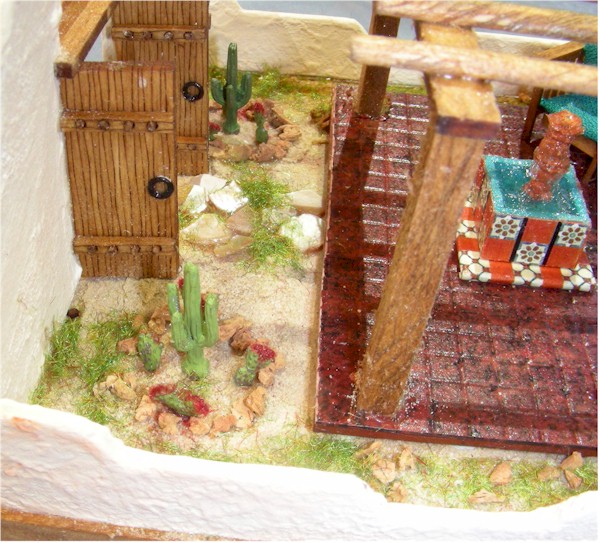
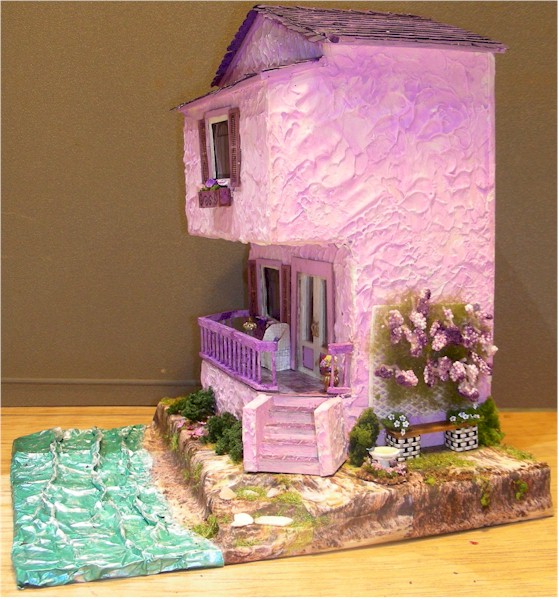
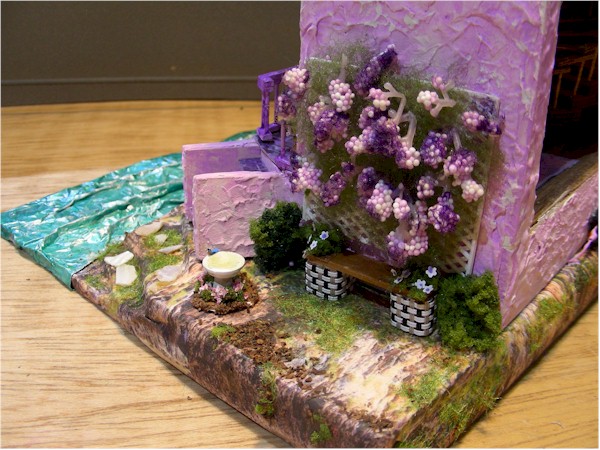
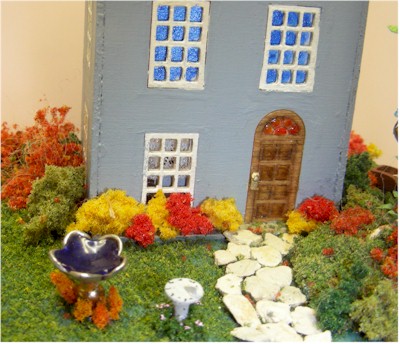
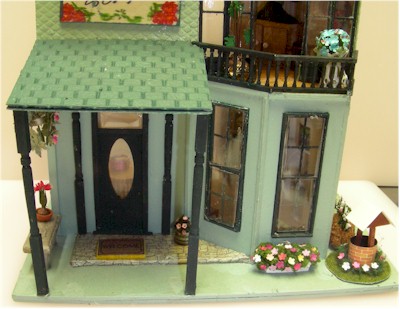
Around the house are flowers and shrubs.
There's a wishing well on one corner and a glazing ball on the back corner.
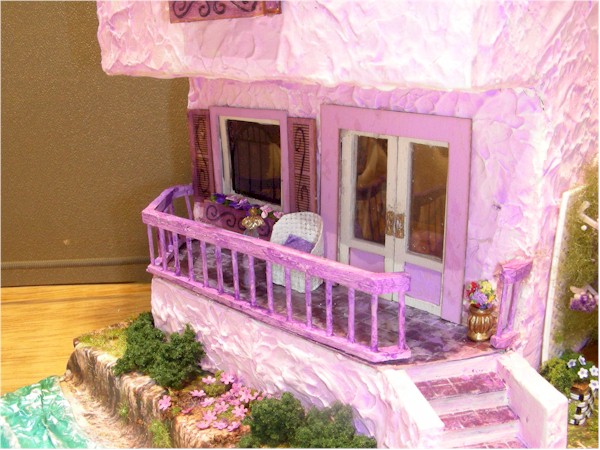
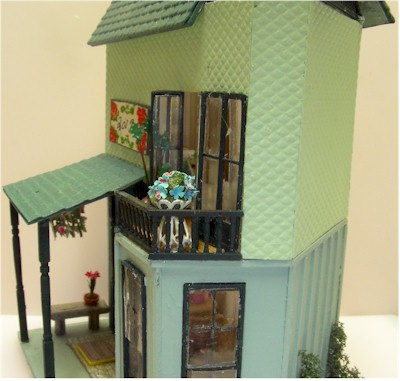
Flowers grow on the balcony.
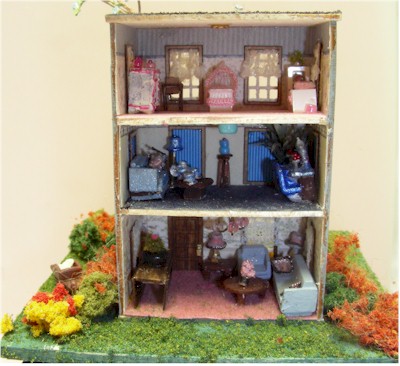
On the third floor, I added a little door and another balcony for more flowers.
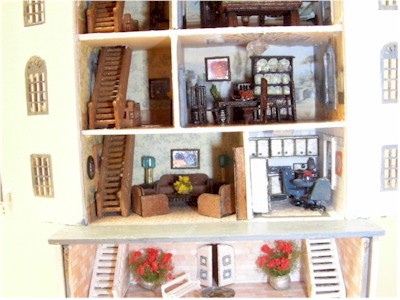
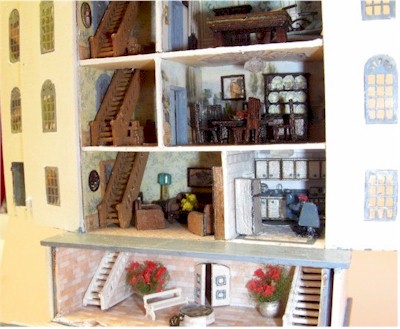
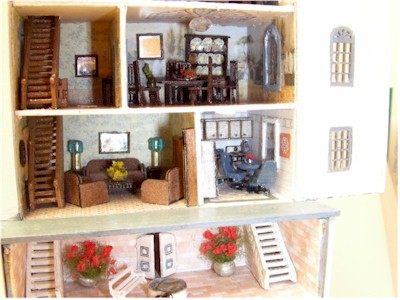
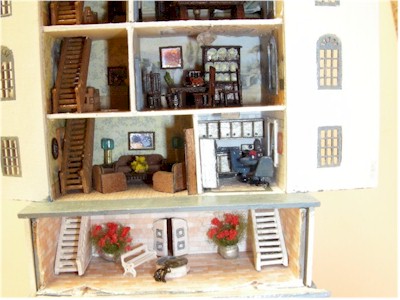
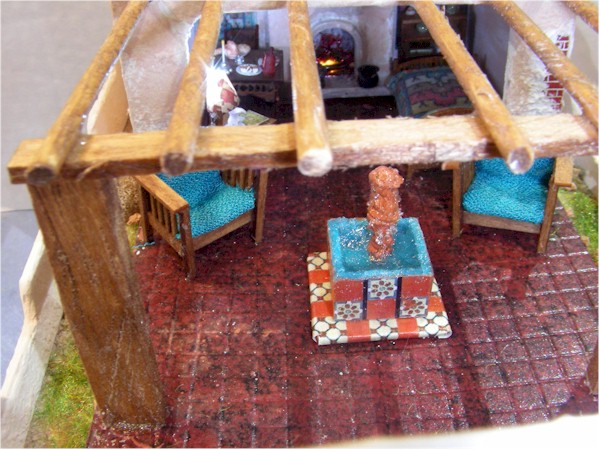
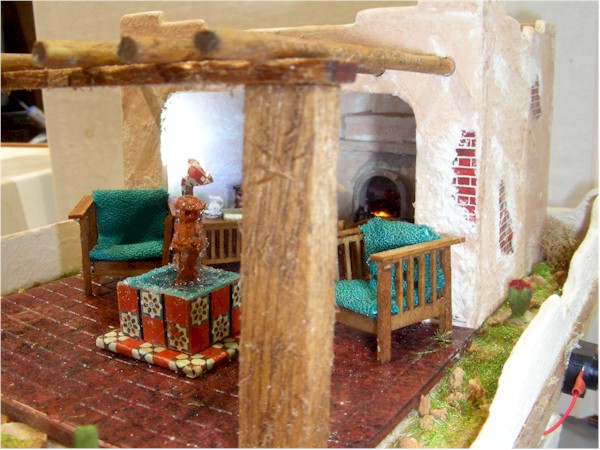
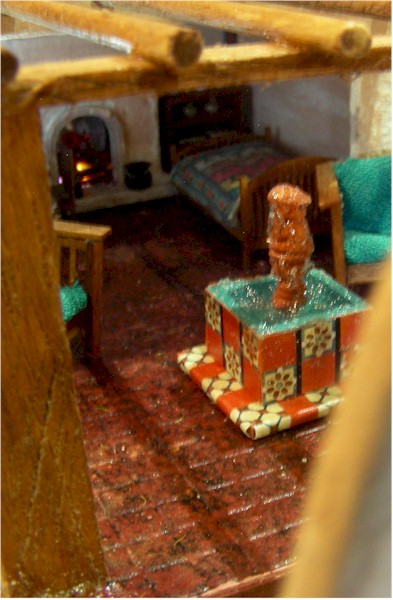
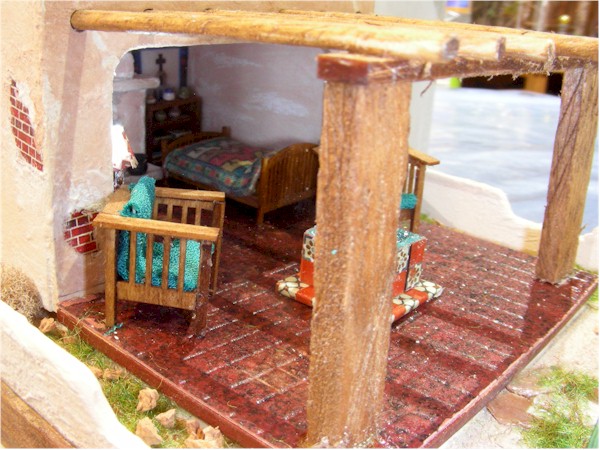
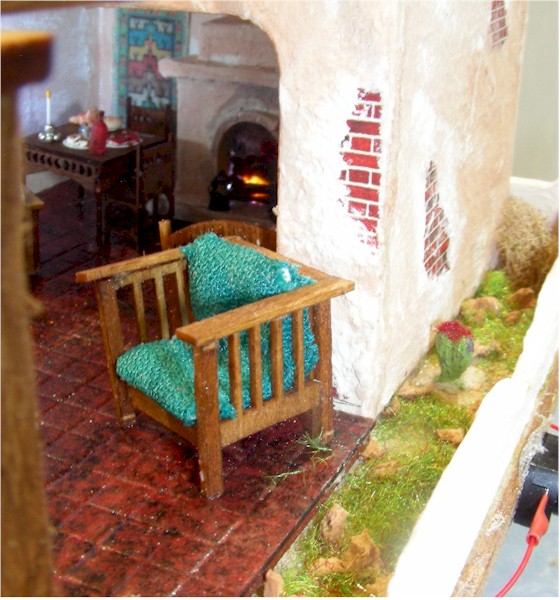
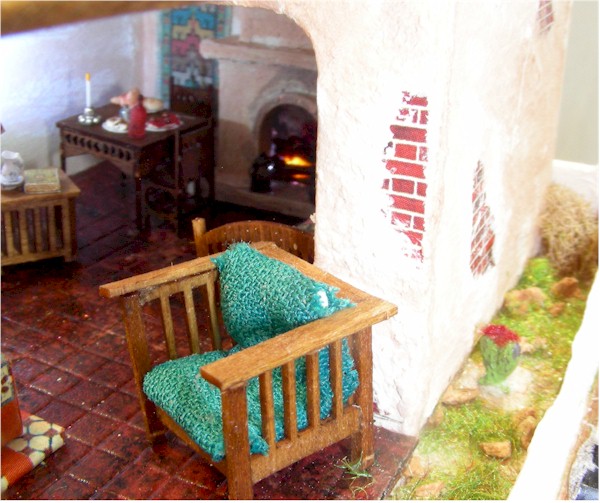
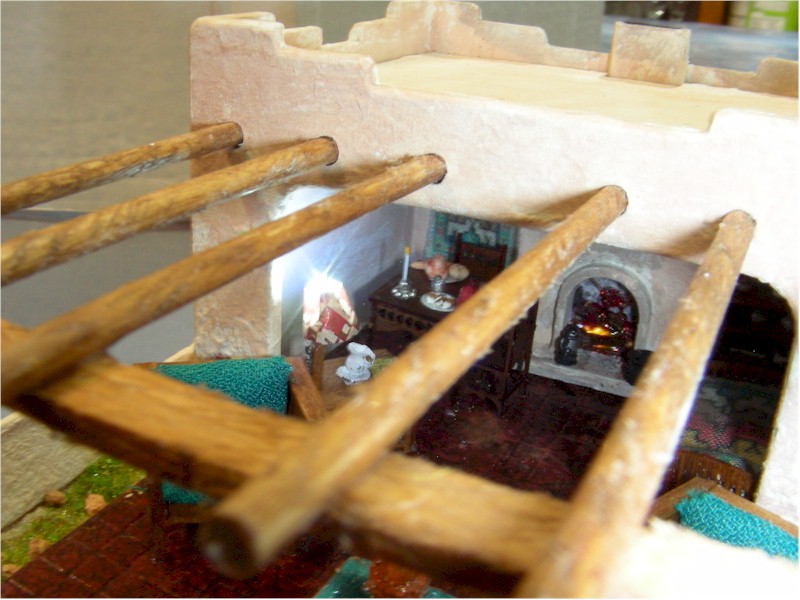
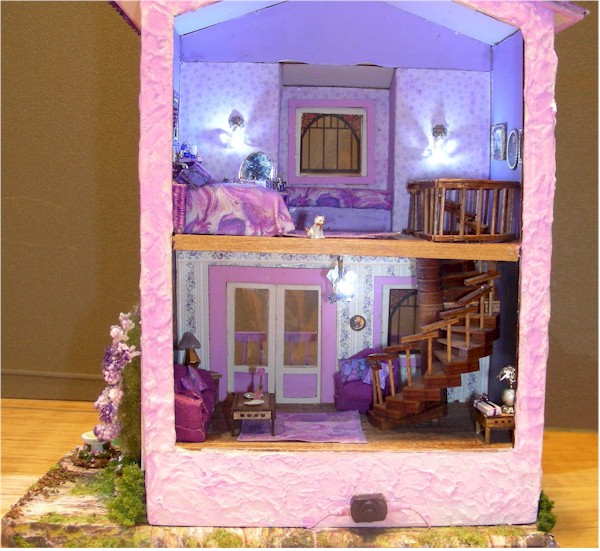
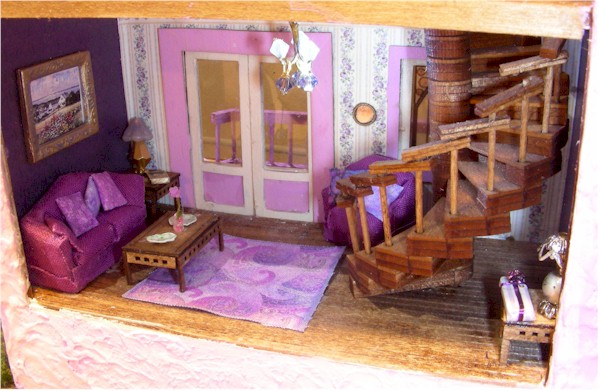
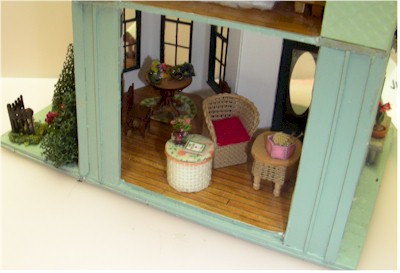
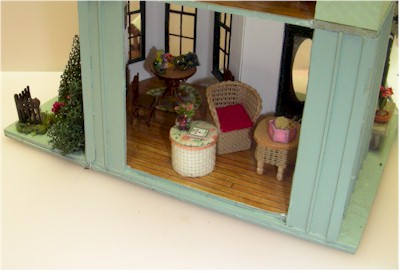
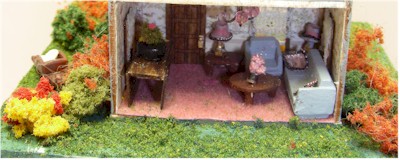
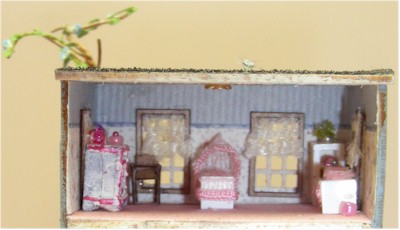
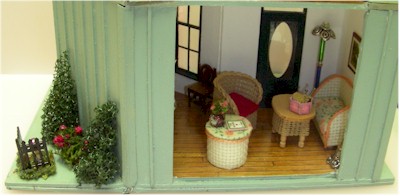
A view of the living room.
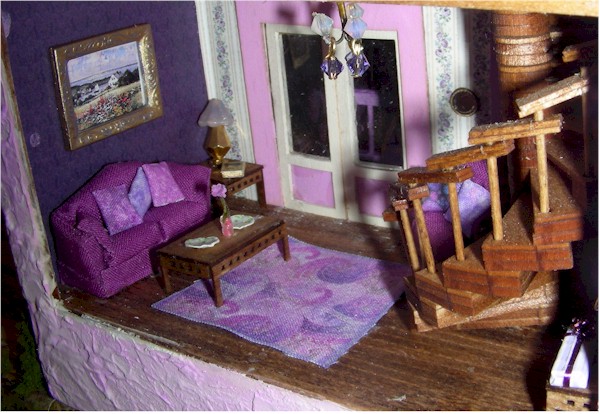
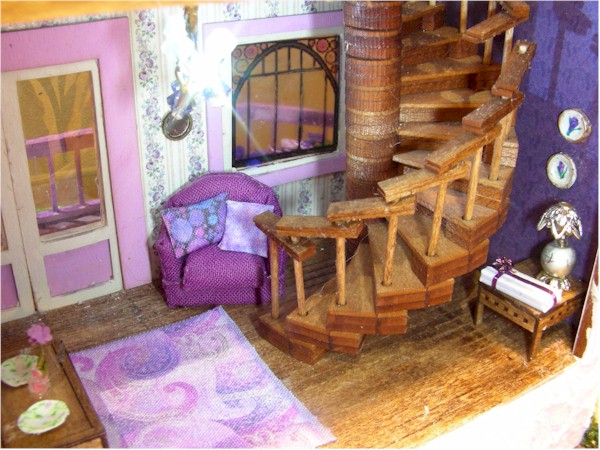
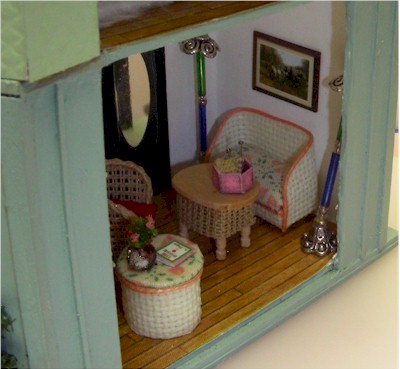
Another view of the Living Room.
 
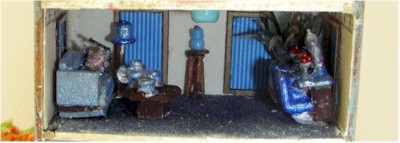
You can get a peek of the dining area in this one.
Another view of the dining area.
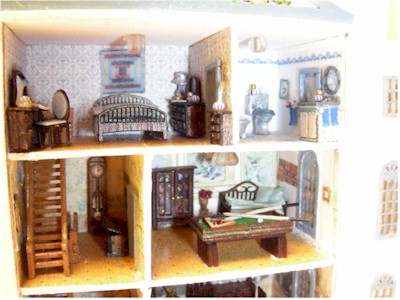
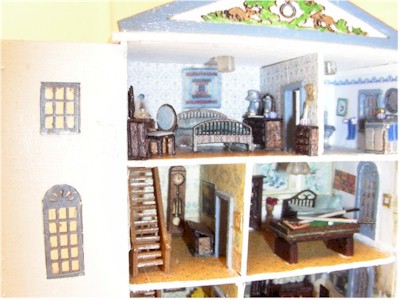
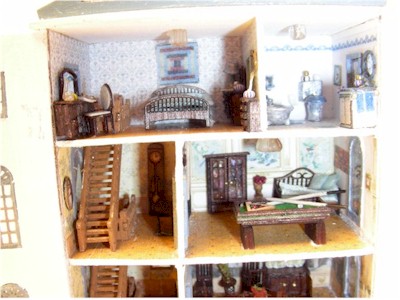
You can get a peek of the little china cabinet in this one. There is also a Grandfather clock by the door but you can't see that.
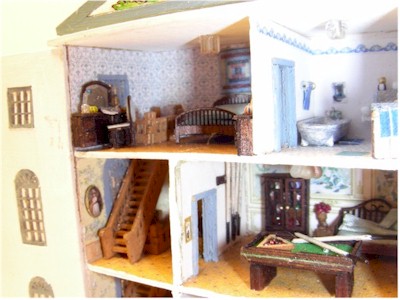
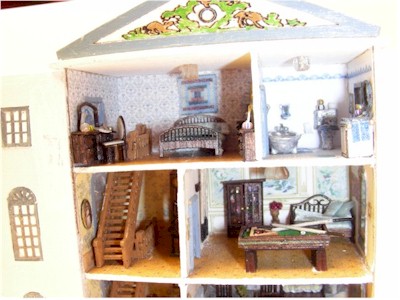
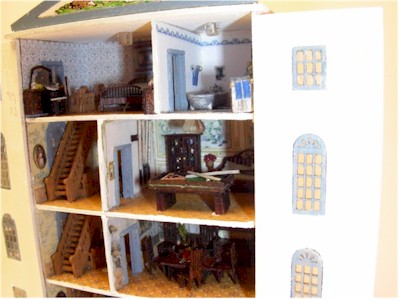
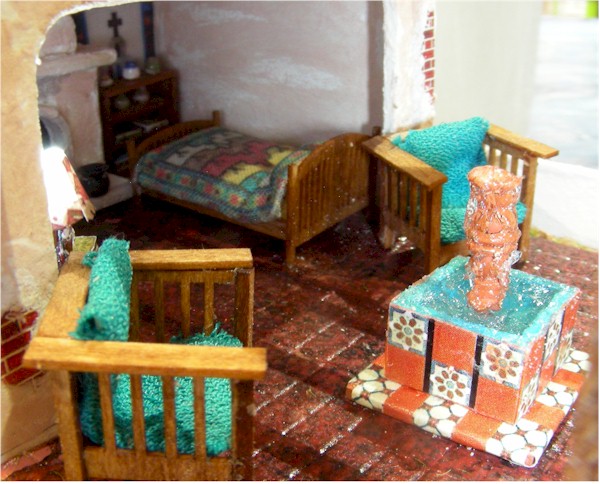
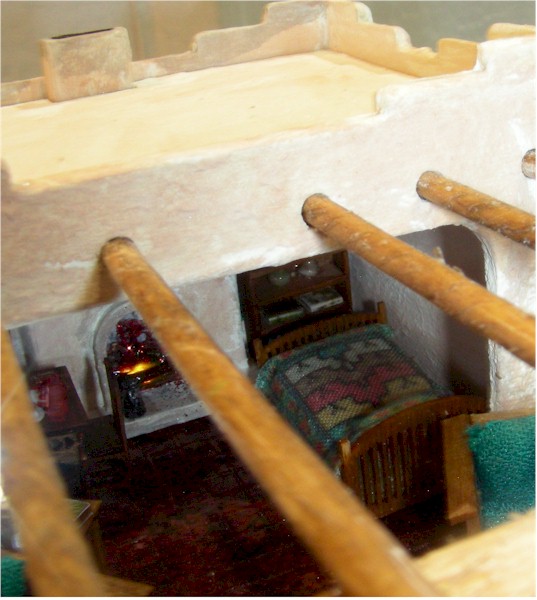
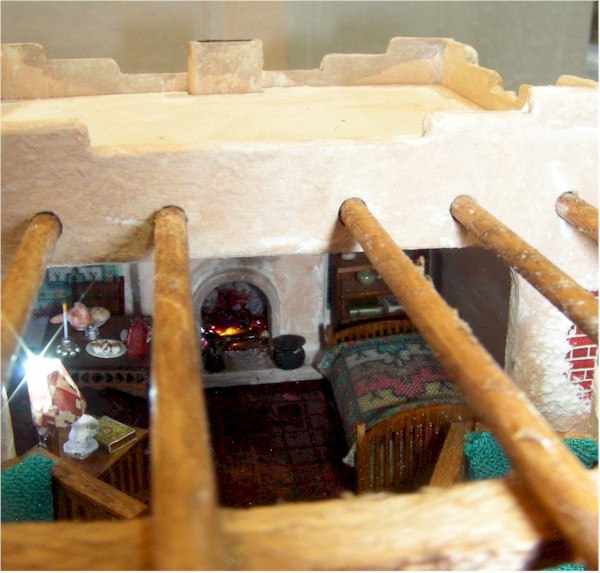
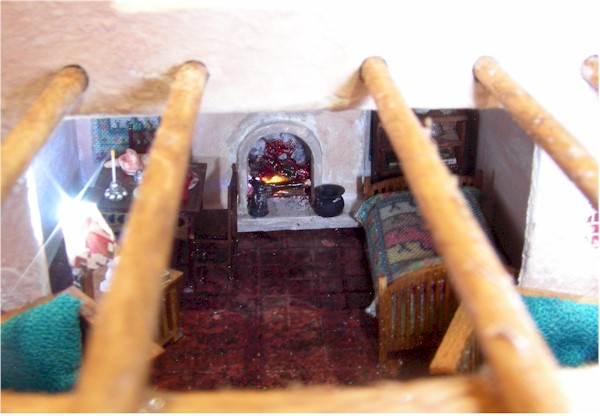
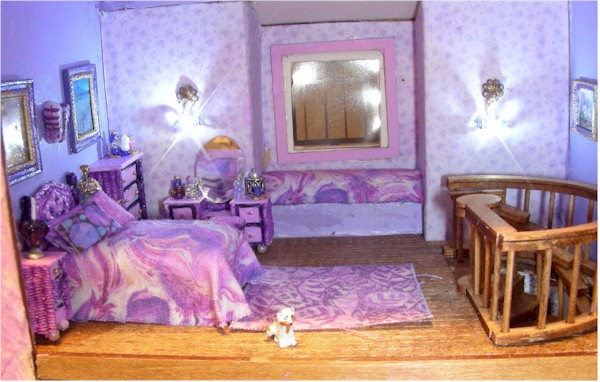
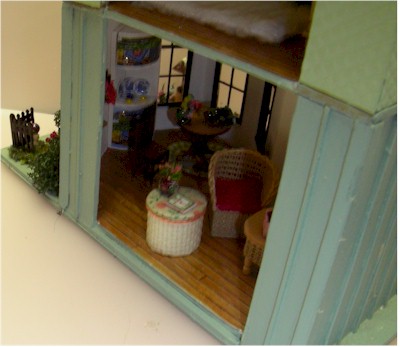
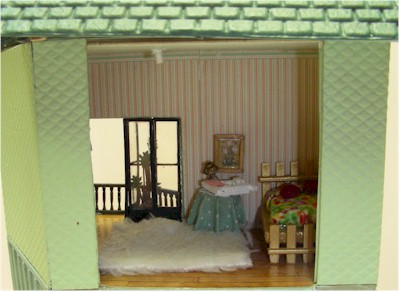
The bedroom area.
The bedroom area.
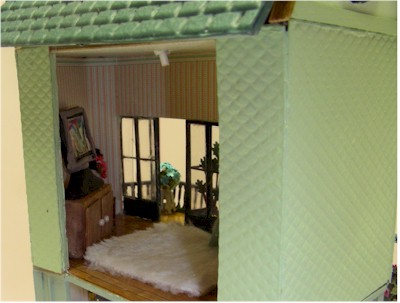
A peek of the big screen TV.
Another view of the bedroom area. You can't see the photo on the opposite walls.
Another view of the bedroom area.
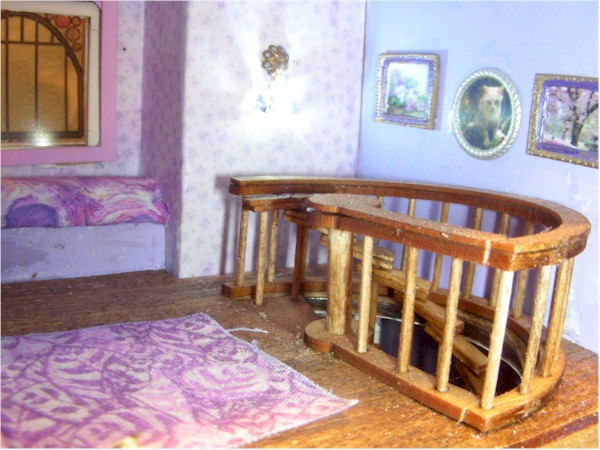
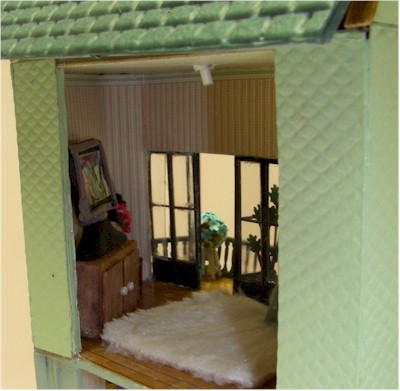
View of the painting on the other wall.
Third floor room getting a new paint/paper job.

144 Scale Blue Town House (completed 2017)
I finished this little 144 scale L & P Miniatures kit quite awhile ago.  But I never did the landscaping for the house. not sure why, it just
got put away and I didn't get back to it until recently. But it's completed now and I hope you'll enjoy it.
144 scale Blue Townhouse
Landscape of Townhouse
Interior of Townhouse
First Floor of Townhouse
Second Floor of Townhouse
Third Floor of Townhouse
Another overview of interior
Notice the birdbath and sundial & tree with morning glory flowers
Another close up
Another close up

The Smallest Project I've Ever Done: Castle on the Buff Village (2018)
Volker Arnold's Village H36 Kit  1:1000 scale
The entire village is only 3 inches by 3 inches. There are tiny people and animals in the village which were the hardest
and smallest things I've ever made. The houses were difficult enough but the figures were worse! A real challenge!
 Castle on the Bluff Village 1-1000 scale  Castle on the Bluff Village 1-1000 scale  Castle on the Bluff Village 1-1000 scale
 Castle on the Bluff Village 1-1000 scale  Castle on the Bluff Village 1-1000 scale  Castle on the Bluff Village 1-1000 scale
 Castle on the Bluff Village 1-1000 scale  Castle on the Bluff Village 1-1000 scale  Castle on the Bluff Village 1-1000 scale

Kits I've had in my stash for years, done in 2018

men's shoes
 1:12
Pair of men's shoes. Never made shoes before!
1:12 Photo Album
1:12 Photo Album - used paintings for pix.
Two QS Hammocks
Two QS Hammocks
1:12 Wood and match box

144 Scale Volker Arnold Baby House
2018 - House built from a Volker Arnold kit. Had to build the house before I could furnish it. I furnished it with
mostly SDK Baby House furnishings though some were Metal Minis.
Built from Volker Arnold Baby House Kit
Total inside of VA house
Inside the closed compartment at the bottom
Inside the closed compartment at the bottom of the baby house. Notice the gold fish in the pond.
Overview of upper part of the house
Top two floors bedroom and bathroom on 4th floor
Stair hall and game room on 3rd floor
Another view of top floors
Another angle of top two floors
Still another angle on top two floors
Front view of bottom two floors and basement
Side view of bottom two floors and basement
Slightly different view of bottom two floors
  View of bottom two floors
View of bottom two floors
Be sure to notice the pool club rack on the wall of the game room
If I get time, I'll try to take more photos of individual rooms.

2022 Valentine's Day Jim's He Shed
I got the original He Shed kit from Ruth Stewart at one of the online shows. I thought I would make my hubby, Jim a He Shed for his birthday
in November. Then when that didn't happen, I'd give it to him for Christmas. That didn't happen either. I finally extended
 it and finished it in February 2022. He got it for Valentine's Day.

The front part of the He Shed is by Ruth Stewart.
The front part of the He Shed is by Ruth Stewart. Side Yard. I had to extend the shed to make room for all the tools in it.
Side Yard. I had to extend the shed to make room for all the tools in it. Grace made the entire extension.
Jim's He Shed
Jim's He Shed
Yard has a fountain with a Cardinal and Gold Finch, an Oriole on the roof along with a squirrel, a baby raccoon at the water barrel and a rabbit (by MiniGems). The fountain and water barrel are by Ruth Stewart and Grace made the tree.
Inside the shed is lit by a deer chandelier (by Ruth Stewart) but I didn't catch it in the photos.
Most of the tools are by Karen Cary except the scroll saw which Ruth made. I also put a cat, Pretty Mama to represent Jim's favorite cat (MiniGems)
There is a MiniGems Chipmunk sitting on the outside of the window.
Maybe you can see him better in this one.
  MiniGems squirrel and an Oriole on the roof. There was another Oriole but it flew away and I can't find it now.
MiniGems squirrel and an Oriole on the roof. There was another Oriole but it flew away and I can't find it now.
Grace cut scale 4x8 sheets of lumber for Jim to use to build with. There also a compressor by Berkshire Valley in the front corner under the counter.
 

SW Retreat, 1:48 scale, 7/2022
This kit was another Karen Cary kit. She called it a riverboat retreat but it didn't look like a river boat to me and you really don't have riverboats
in the SW. So I just call it a SW Retreat. It was very difficult to photograph.
Side View of Retreat
Other Side view of Retreat
The retreat has a fountain in the courtyard.
I put two chairs to relax on in the courtyard.
but you can see the little bed,
It was difficult to take photos of the inside but you can see the little bed, kit by LP Designs. I made the fabric for the bed.
You can glimpse the bed again and the book case
You can glimpse the bed again and the book case in the corner which has Nigh's pottery on the top shelves and books below.

You can glimpse the SW table (kit by Bonnie Lavish). The foods are things I've traded for over the years.
The chair kit and the corner table with
The chair kit and the corner table with the lamp are by Karen Carry though I did make the lamp a working lamp.
Wall hanging are swaps.
Not a lot of room for yard but I made
Not a lot of room for yard but I made two little garden areas. The rock are actually cork. The cactus are Metal Minis.
The other front cactus garden.
Finally figured out how to get a couple photos of the inside.
Finally figured out how to get a couple photos of the inside. Note the light fireplace. I has a pot and coffee pot on the hearth. You can also see the wash basin and book on the corner table.
Another view of the bed.
Best view of the interior.
Best View of the fire place.
Hope you enjoyed the retreat where you can kick back and enjoy just hanging out.

Lilac Sea Cliff Hide-A-Way 7/2022
The Sea Cliff Hide-A-Way is another kit created by Karen Cary. However, I bashed this kit a bit to make it my own. First, I changed the color from coral
to lilac. I was tired of coral colored houses as I have several of that color. I changed the roof from tile to shingles and painted them purple instead of terracotta.
I put the shutters on both windows instead of all on the top one. I added the same porch tiles to the steps instead of leaving them plain.
Lilac Sea Cliff Hide-A-Way
Side view Hideaway
Garden View of Hideaway
Back View of two room Hideaway
Close up of the garden.
Close up of the porch
Living Room. I made the sofa an
Living Room. I made the sofa and chair. The tables are by SDK Miniatures. Other accessories were swaps.
I used LED lights on the tiny fish
I used LED lights on the tiny fish hook chandelier I made. 
spiral staircase didn't leave
The spiral staircase didn't leave a lot of room in the rooms for furnishings.
Second Floor Bedroom
Second Floor Bedroom. The bedroom set is Quicker Wicker.
 
Though you can't really see them, the LED lights are again tiny fish hooks with one side cut off to make sconces.

I made the paintings and pictures on the walls. Painted the picture frames and made the tiny perfume and accessories.
Hope you enjoyed my Lilac Sea Cliff Hide-a-way. The water was made according to the directions in the kit but I forget the name of who taught the method to Karen. It was using aluminum foil.  

Fairy Room Box - 2/ 2023
I've had this room box kit by Michelle's Miniatures for many years and finally put it together. I had one fairy chair left by Cheri Stewart that had not sold, and since she passed several years ago, I decided to keep the fairy chair in remembrance of her. I wasn't real inspired on this project but decided to use the little painted fairy figures that I already had. I made the fairy queen sitting in the chair. Created the mushrooms for the little fairies from buttons used to hide screws in furniture with sparkles sprinkled on top. I created the back wall with water color pencils which I had never used before. I also used fingernail decals to help decorate both the inside and outside. Don't know why I made the floor so colorful but it just felt right somehow.


All Photographs on this site are the property of Virtual Dollhouse and its advertisers. Anyone using the photographs without the permission of the owners will be prosecuted.

Home Page: Virtual Dollhouse


LINKS:  HOME PAGE   See "Site Contents" on the left of your screen.
Check out; Related Sites for more miniatures for sale.

These pages are not abandoned. They are historical pages that do not change.